


HOW TO.....
Beginners Guide to Making Zombies!
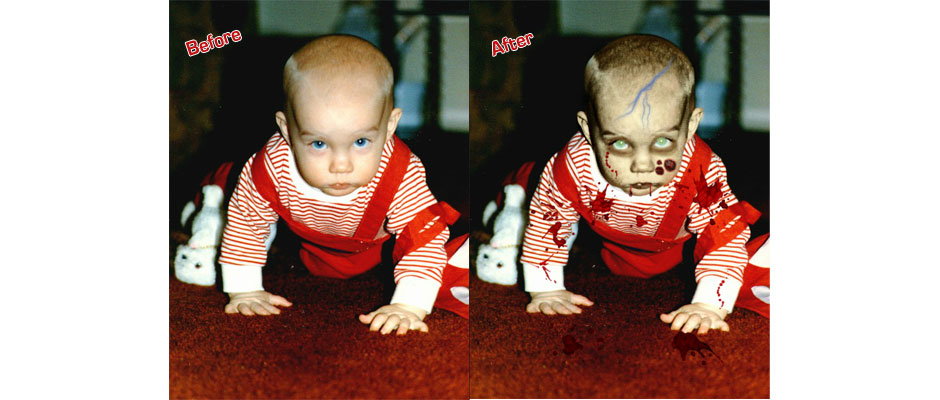
I will admit it- I have "The Walking Dead" fever! I can't get enough of that show, so I thought I would make some zombies of my own. I used PicMonkey because it is the fastest & easiest way to make fun creative zombies.
Step 1 - Zombie Skin
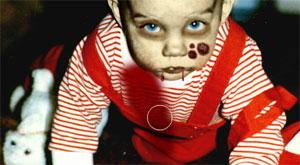
PicMonkey calls this "Zombulate", where you take the very alive looking skin tone & change the color so it appears more zombie like. There are various colors to choose from, but I picked the yellow-ish hue to contrast with the darker colors in my background. I adjusted the decay level so that my little baby had a more subtle zombie look to it, rather than an older rotting zombie.
Hit Apply to add this feature to your picture.

Step 2- Bruised Zombie Eyes
Zombies usually look as if they haven't slept in a few years, so it was imperative that I add bruised skin around the eyes. The setting is called "Zombie Bruise". To make the bruises around the eyes look more natural (as natural as a zombie can get), first use a larger brush and add a yellow color and crank the fade up, so that the look is more subtle. Then hit APPLY. Then open it up again, choose a smaller brush and a new color to give it more dimension.
Hit Apply to add this feature to your picture.
Step 3- Gashes & Blood
You can't have a zombie without a lot of blood! There are two settings you should play with & have some fun. Gashes & Slashes and Blood Drops.
Gashes & Slashes is pretty self explanatory. Select one of the gashes & drag it where you want it and then resize it and rotate as necessary. If you are going to have a large gash going across body parts that don't bleed, such as the eyes. Click on the gash, and you will see a utility box appear. Click on the "Erase" tab, adjust the brush & the hardness and erase over the areas. This will give you a more realistic look.
The dripping blood can be really dramatic, or it can just be a few drops. There are many drop sizes to choose from. Make sure to utilize the eraser tool where the drip & the lip meet to make it look more realistic. You can also adjust the angle of the drop in case the mouth is slightly turned. Keep in mind that gravity still prevails, so the blood drop should still drip down, not sideways, so don't angle it too far in any direction.
There is no "Apply" button for these two features, so if you add a gash or blood drop that you don't like, just click on it and when the box appears around it, hit delete.
If you haven't done so yet, this might be a good time to save your image so you don't lose your work.
Step 4- Blood Spill
Being attacked by a zombie can be messy, which is why you can spill blood all over your person, on objects... the floor...etc. You just select your brush size, adjust the size of the brush. Go with a larger brush to make it look like spilled blood. Smaller brushes are too precise and it will look like you drew the blood on (which isn't the effect you want).
I chose not to add the blood spill on my picture because there was already so much red with the overalls, that it just made the shirt look like it was part of the red overalls.
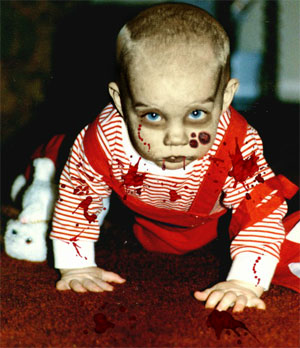
Step 5- Adding Blood Spatters
I had a lot of fun adding Blood Spatters to clothes, which I felt was more fitting for my picture than the blood spill. There are different sizes & shapes of blood spatters. If you use the same spatter a lot, rotate the spatter around so that it looks a little different. If you are unsure how to rotate a splatter, use your mouse & and click on the splatter and a box will appear around it. At the top of the box, you will see a circle, hover your mouse over the circle and it will allow you to angle your splatter left or right.
There is no "Apply" button for blood splatters, so if you want to get rid of a splatter, just click on it and when the box appears around it, hit delete.
Take a moment to save your work.
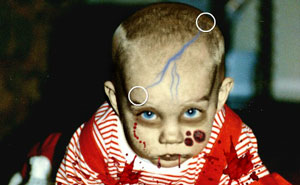
Step 6- Adding Veins
The Veins feature allows you to add veins ranging in color from red to purple, to blue. Use the sliding bar to make your veins thicker and add branches. To move your vein to your desired location, use your mouse to drag the circle at the top to the spot where you want the vein to start and then drag the bottom circle to where you want it to end.
If you want the vein to be more subtle, so that it's just hidden underneath the skin, adjust the fade sliding bar.
Hit Apply to add this feature to your picture.
Step 7- Zombie Eyes
There are two eye features you can use, Corpse Eyes, and Corpse Eye Colors. For my picture, the Corpse eye was a bit too intense, so I opted with the green eye color.
When adding the Corpse Eye, adjust the size to match as closely as possible to the size of the original eye.
You are given some cat eye choices, you will want to adjust the pupil so it is aligned with the subjects original eyes. If their head is tilted, you will want to tilt the eye as well. The other circle pupils won't really matter.
There is no "Apply" button, so if you don't like your eye, just click on it with your mouse and hit delete.
When adding a Corpse Eye color you will want to adjust your brush to the size of the subject's pupil to cover up the original color. You can click a few times to get the desired effect and to cover up the entire pupil.
On the Corpse Eye or and Corpse Eye Color, if the eyelids cover part of the pupil, use the erase tool to erase the fleshy parts. On the Corpse Eye, you will need to click on each pupil, and a utility box will appear. On the Corpse Eye Color, the eraser tool is located to the right of the brush size.
Hit Apply to add this feature to your picture.
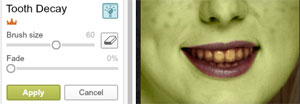
Step 8- Tooth Decay
I didn't have teeth to destroy, but I will still cover this since no zombie has pearly white teeth! You will want to adjust your brush so that it is a little smaller than the height of your teeth. Brush over the top of your teeth to add the rotting orange color. As you get to the teeth further in the back you may need to make your brush smaller to avoid painting over your lips or skin. You can paint over the lips if you didn't paint over when you added the zombie skin.
Hit Apply to add this feature to your picture.
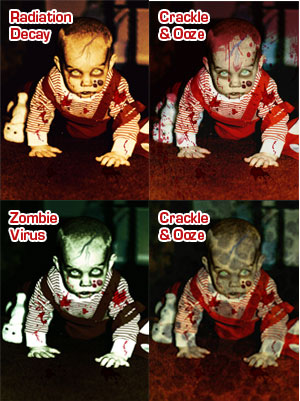
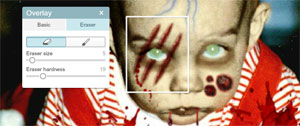
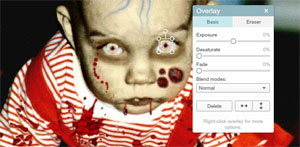
Step 9- Adding Overlay & Textures
If you really want to amp up your picture, you can add some overlays and textures to your picture. Radiation Decay will add a reddish hue to the entire picture. Adjust the brightness and fade for a more dramatic effect. The Zombie Virus will add a green hue to the entire picture, and you can also adjust the brightness for a more dramatic effect.
The Overlays are called "Crackle & Ooze" which allows you to add a "film" on top of your entire picture. It can be virus cells, blood, and some other stuff I can't identify. Either way, it all looks pretty cool.
I did not add the overlay or texture to my picture because I feel like it takes away from all the work I just did since it changes the colors and the look of everything. So it's up to you.
Hit Apply to add this feature to your picture.
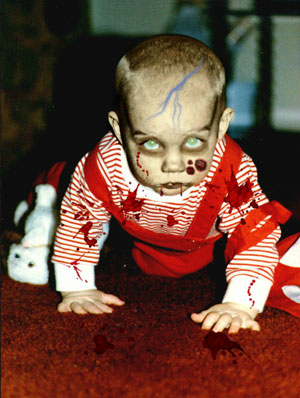
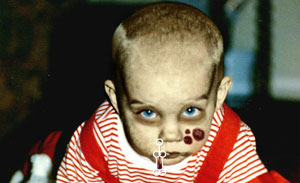
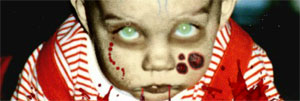
My Final Zombie
Check Out Our Great Tutorials on Digital Images, Videos & More
Editing & Color Correction |
|
Fun & Quirky Tutorials |
|
Emailing, Cropping, Unzipping & Downloading Files |
|
Do It Your Self Guides |
|
| |
Protecting & Storing Digital Files |
|
| |
Digital Cameras |
|
| |
