


HOW TO.....
Beginners Guide to Making Andy Warhol Inspired Pop Art
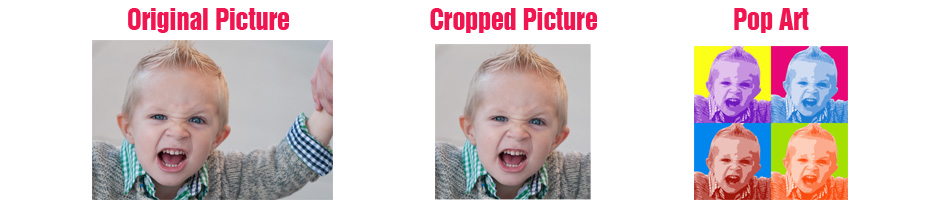
Digital Photography is great, especially when you take a silly photo
and amplify it by making an Andy Warhol inspired Pop Art!
Pop Art Step 1
Set Up Your Image
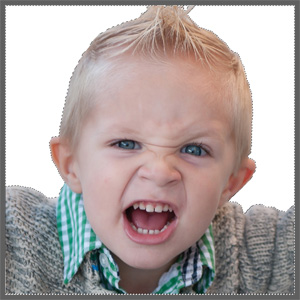
First, pick a fun photo, and crop it down to the size you want. I prefer getting my image down to a square because I like the uniform Pop Art look. You can keep you image any dimension you like.
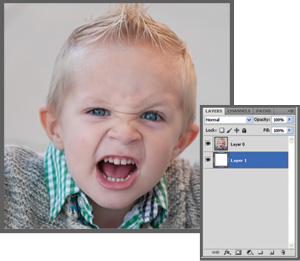
Open your image in Photoshop. Look at your layers panel, if the photo layer is set to the background, change it to a layer. If you see the little lock symbol, just double click it & it will convert the picture to a layer.
To keep things clear, you can rename your photo layer "Photo" and your new layer "background".
Pop Art Step 2
Selection
To make your Pop Art really stand out, we need to delete all the stuff in the background of the photo. There are different ways to do this, you can use your eraser tool, but your edges won't look very good. I would recommend using either your pen tool or the lasso tool.
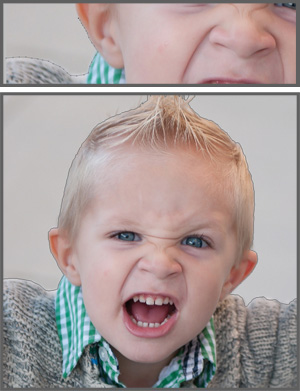
Pen Tool:
Select the pen tool, it should be on your toolbar along the left panel. The pen tool allows you to make little anchor points that will connect to each other which will trace around the person/object. You can make your clicks as close together or as far apart as you would like. If you look at the to picture, you can see how close together I have my anchors. When you are done, connect your ending anchor to your beginning anchor, and you will have a solid outline around your person/object.
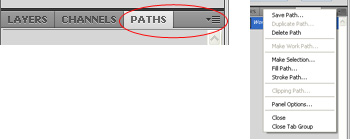
Selection:
Right now you have essentially drawn a line around your image, but now we need to select it. Go to your Paths tab by your layers box, click on the path tab, and on the top right corner you will see a small drop down arrow, click on the arrow. A window will appear, you will want to click on "Make Selection"
Pop Art Step 3
Invert & Delete Background
Invert:
Once you have selected your outline, you will see the "marching ants" around your image. To get rid of the background you will need to invert your selection, to do that, you can hit Control+Shift+I which will invert the selection. If you prefer, you can go to "Select" on the top toolbar & go down to invert.
Delete:
Once you have inverted your selection you will want to hit the Delete key to delete the background.
As you can see, my background is now white. The white you are seeing is the "background layer" we created earlier. Your layer might be transparent, don't worry about that if it doesn't look exactly like mine.
Pop Art Step 4
Desaturate & Contrast
Desaturate:
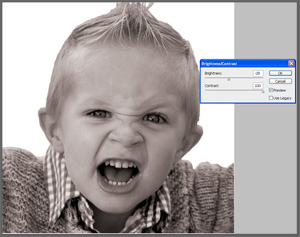
The next thing you will want to do is desaturate your photo. This will make your photo either B&W or a little sepia toned. To do this, hit Control+Shift+U
Add Brightness & Contrast:
Next, you will want to add some brightness & contrast. Have fun, add contrast until you feel that your image looks a bold.
Pop Art Step 5
Cutout Filter & Levels
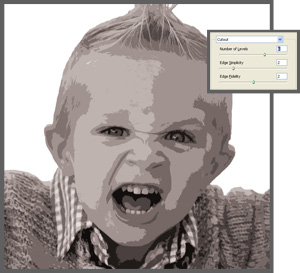
Cutout Filter:
This is where you will start to see some of the fun Pop Art effects.
First, make sure you have your "photo" layer selected.
Then, go to Filter - Artistic- Cutout
If the option is grayed out, you probably need to change your image from CMYK to RGB (Image - Mode - RGB).
Start your settings out at :
Number of Levels: 4
Edge Simplicity: 2
Edge Fidelity: 2
Play around until you get your desired Pop Art look
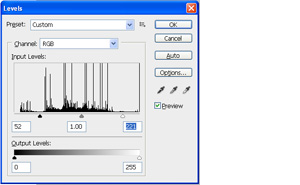
Levels:
Now, you will want to adjust the levels (Control + L ).
Play around with your settings, you will want a shade of black, shades of gray & a shade of white.
Play around until you feel like you have a good detail & sharp lines.
Cutout Filter... one more time:
You will want to go to Cutout filter one more time. Increase the edge simplicity, but play around until you have your desired effect. Remember to make the lines sharp & dramatic, otherwise you Pop Art will look flat.
Pop Art Step 6
Preparing Your Canvas

New Canvas:
You are going to create a new canvas, (Control + N), you will want to create the dimensions so that it is double in width & height as your original image. Meaning, if your original is 1000 pixels wide & 1000 pixels in height, you will want to make your new canvas width 2000 & height 2000. This will make it easier when you try & stack your four images, because your images will fit perfectly in your canvas.
Now, you need to copy your images into your new canvas. You can drag & drop, Copy & Paste, or Place the file into your canvas.
Add Background Layer:
You are going to create a new layer, and title it "Background"
Make sure that your background layer is below/beneath your "Photo" layer.
Select your background layer.
You are going to use the rectangle tool to create a box, matching the exact size of your photo. This will be your background & we will change the color in a moment.
Add Color Layer:
Create a layer & place it in between the photo & background layer.
Name the layer "Color".
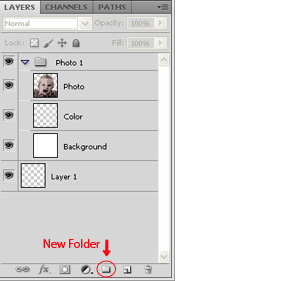
Organizing Your Layers:
In your layers panel you will want to create a new folder & name it "Photo 1".
Then, grab your photo layer, color layer & your new background layer & drag them into the new "Photo 1" folder.
If you have done that correctly your layers inside the folder will be indented.
Now, click on the "Photo 1" folder & right click & go to "Duplicate Group".
Repeat this 3 times so that you have 4 Folders.
Rename each folder, "Photo 2", "Photo 3," & "Photo 4"
Moving Your Layers:
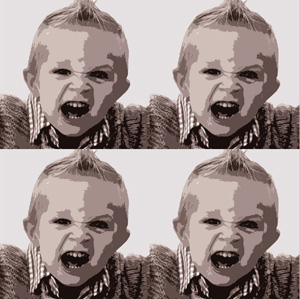
Now, you will want to grab your folders & line them up in your canvas. You will want to move your entire folder layer, not just the individual photo layer. Click on the "Photo 1" folder & move it to the top left corner. Then grab your "Photo 2" folder, and move it to the top right corner....etc. If your canvas has the correct dimensions, this will be really easy to get them aligned.
Once you have completed this task, your canvas should look similar to mine.
Pop Art Step 7
Adding Color!
Background Color:
In the Photo 1 Folder, make sure you have your background layer selected.
Using your paint bucket tool, choose a color for your background layer.
Follow this step for all 4 background layers.
Coloring the Face:
Adding the color to the face is easy, but not as simple as dropping a layer of color on top.
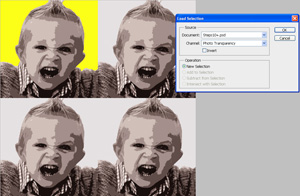
Click on your Photo layer.
Then, go to Select - Load Selection
Hit Okay
You will now see that your photo layer is perfectly selected and you will have the "marching ants" effect.
Now, Click on your Photo Layer, and use the paint bucket tool to drop color onto that layer.
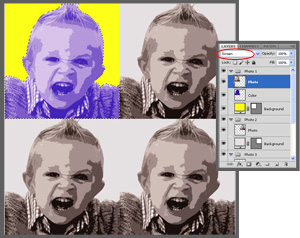
Screen:
Now, click on the Photo layer & change the mode to Screen. This is near the top of the layers box, it is circled in red on my example.
Hue & Saturation:
If you want the color over the face to really pop, you can play around with the Hue & Saturation to make the colors more dramatic.
Image - Adjustments - Hue & Saturation
Repeat these steps for all 4 of your photos until you have gotten your desired Pop Art effect!
Pop Art Step 7
Finished Product!

Check Out Our Great Tutorials on Digital Images, Videos & More
Editing & Color Correction |
|
Fun & Quirky Tutorials |
|
Emailing, Cropping, Unzipping & Downloading Files |
|
Do It Your Self Guides |
|
| |
Protecting & Storing Digital Files |
|
| |
Digital Cameras |
|
| |
