


HOW TO.....
Tutorial on Digital Scrapbooking with My Memories Suite v3
So you've had your images all converted to digital format and you want to do something special with them? Well, digital scrapbooking is the perfect answer, and the My Memories software is ranked as the best! With this software,you can create photo books, download your digital scrapbook on your iPod for portable viewing, or even create a calendar using the designs you create! Here you will learn the most simple way to create your first digital scrapbook.
Step 1:
Digital Scrapbook
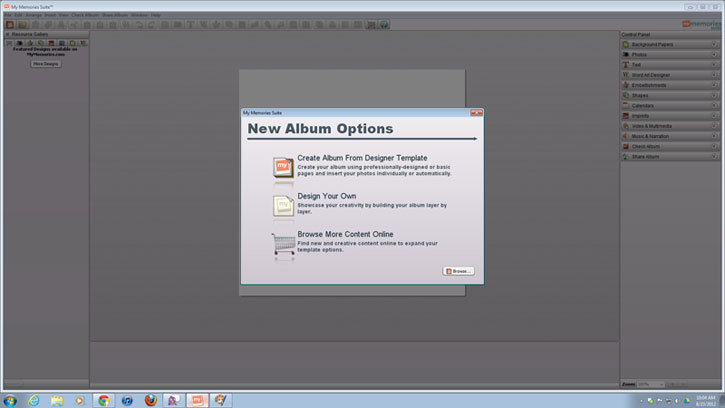
Open the software. You have the option to create your scrapbook using pre-designed templates, or by starting on a blank slate, and creating your own. For the purpose of just learning the software, this tutorial will go the route with the read to go pages, so select "Create Album From Designer Template".
Step 2:
Digital Scrapbook
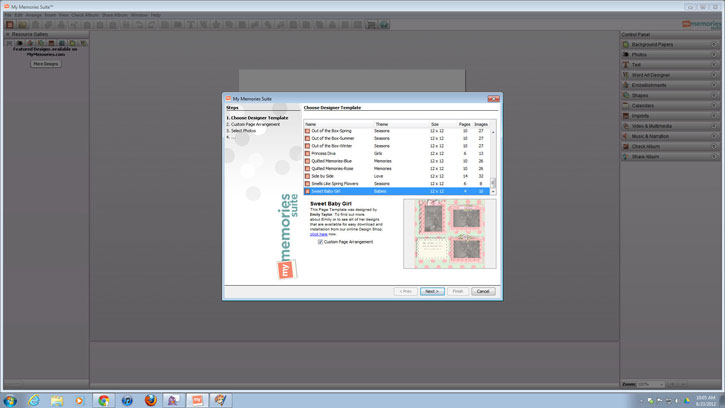
Choose the template style you want your scrapbook to be. They have choices from Winter and Halloween, to Contemporary and Simple. I have decided to use the "Sweet Baby Girl" set.
Step 3:
Digital Scrapbook
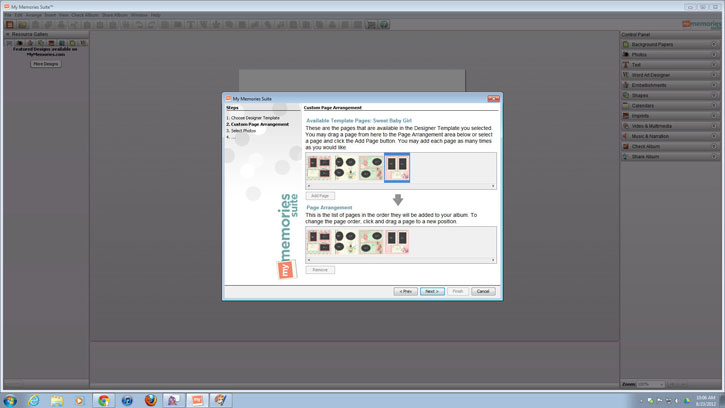
Organize the order of your pages. You can add more pages so that certain styles repeat by doing a simple drag and drop, or you can removes templates that you don't like by selecting a page in the "Page Arrangement" section, and simply clicking "Remove".
Step 4:
Digital Scrapbook
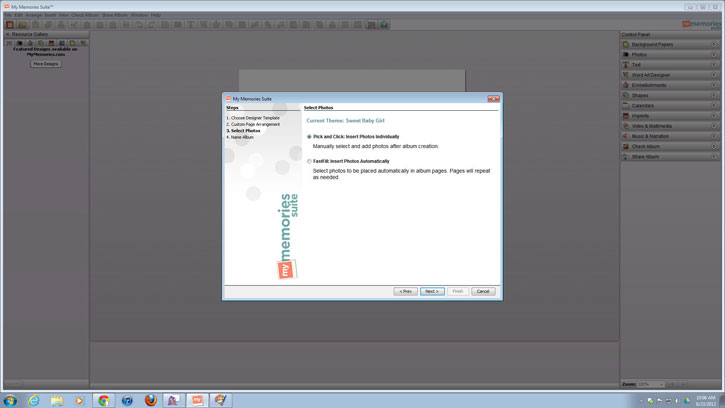
Let's choose our settings for how you want your images placed. The software will ask you if you want to "Pick and Click" which will allow you to choose the pictures you want, and place them wherever you want. There is also an option to do a "FastFill", where you still get to select what pictures you want in the scrapbook, but the software will automatically place it in photo slots. This tutorial will show you how to do the "Pick and Click" option.
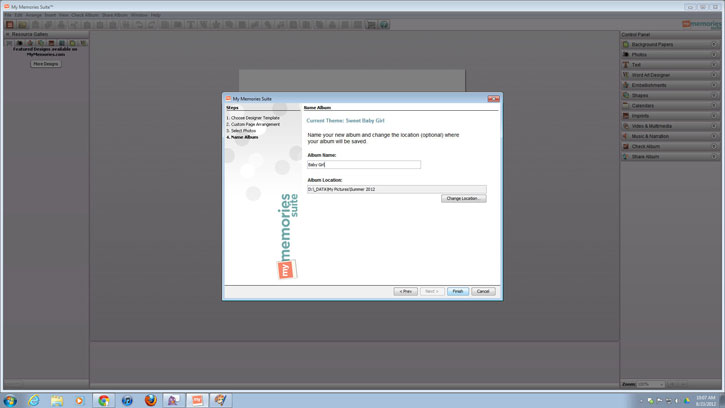
Step 5:
Digital Scrapbook
Now it's time to designate where you want your scrapbook to be saved on your computer, and what to name it. Click "Finish" when you have completed these sections, and let the fun begin!
Step 6:
Digital Scrapbook
Your first scrapbook page will automatically load, and you will see there are grey images with the text "Your Photo Here"- that's where your pictures will go! To choose your pictures, click on the "Photos" icon under the "Photos" tab.

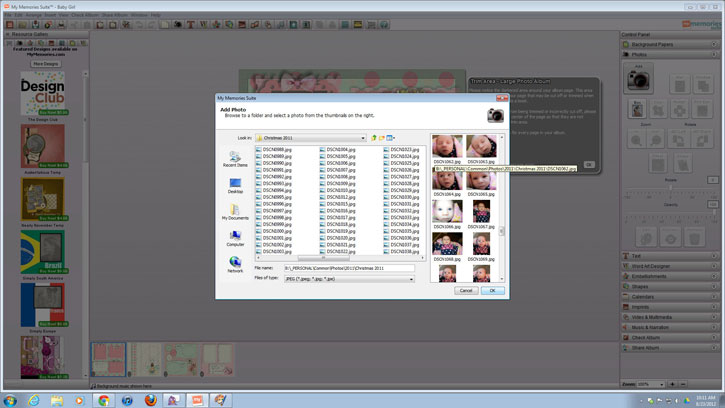
Step 7:
Digital Scrapbook
While choosing your photos, you can view a small thumbnail version on the side to help in your decision making. This software allows you to only choose one image at a time, so when you have picked an image, press "OK" to place it on your page.
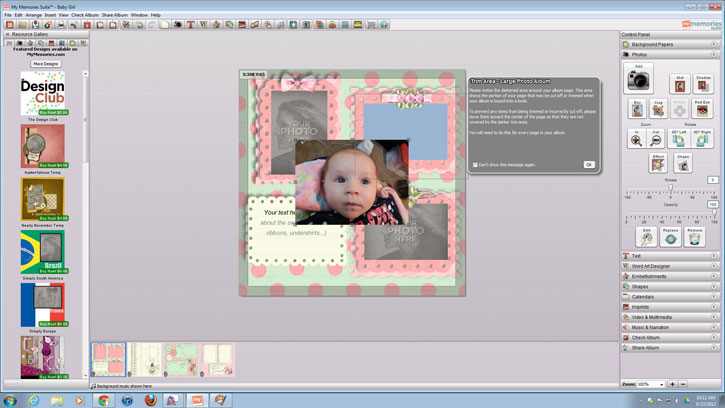
Step 8:
Digital Scrapbook
Now your image is on the page, but it needs to be placed in the gray area! Simply click and hold your mouse on the image, and drag it over to the gray area until that said area turns blue, as shown in the picture below. Release your mouse and your image is now in it's designated spot!
Step 9:
Digital Scrapbook
Personalize! For adding your own text, just click on the "Add T" under the "Text" tab, and a text box will appear where you can enter whatever text you wish. Or, to just change the text in the pre-designed text box, click on "Your Text Here". To make the text have more of a designed element to it, select the "Word Art Designer" tab.
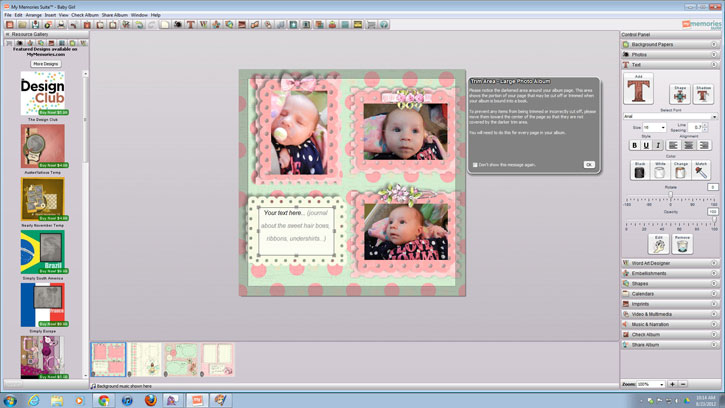 This software also enables you to add embellishments. You can choose which embellishments to add by selecting the "Embellishments" tab. Embellishments will include decorative images such as the bows and ribbons already placed on the page shown. They will also have choices for art images such as pencils and paperclips for a back to school feel, or abstract designs for a background element.
Step 10:
Digital Scrapbook
Once you have placed all the images and extras you want on each of the pages in your album, select the tab "Check Album" where you can preview what your scrapbook will look like, and check for spelling and errors.
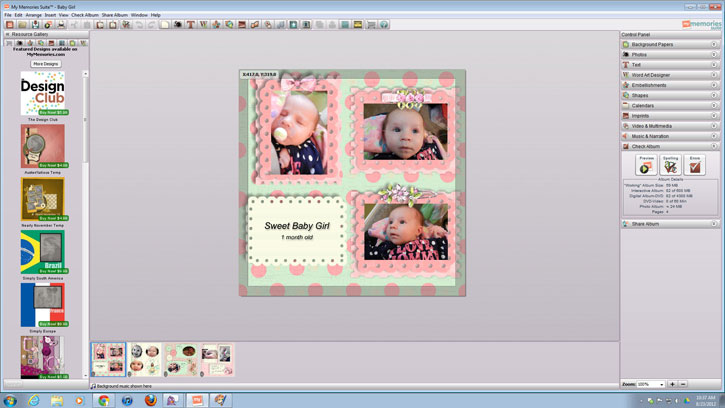
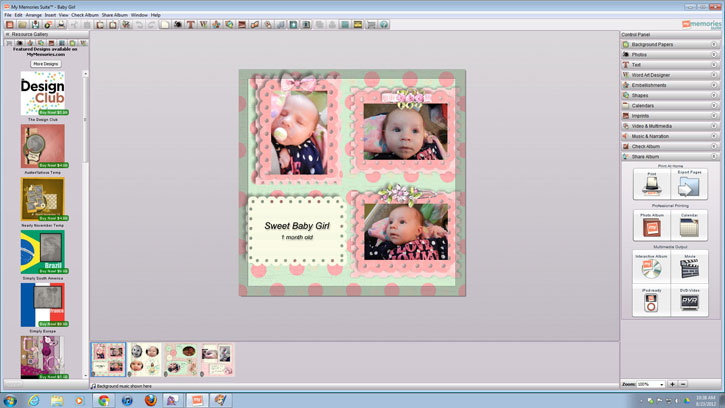
Step 11:
Digital Scrapbook
Now that you have completed your digital scrapbook, click on the tab "Share Album" where you have lots of choices in saving your book. You can print your book, create a photo book or calendar, or even put the scrapbook on your iPod!
After completing this tutorial you will be a pro at managing this digital scrapbooking software! You can probably even design your own templates! For more questions on managing this program, as well as purchasing additional templates, pages, and embellishments, visit www.mymemoriesblog.com.
Check Out Our Great Tutorials on Digital Images, Videos & More
Editing & Color Correction |
|
Fun & Quirky Tutorials |
|
Emailing, Cropping, Unzipping & Downloading Files |
|
Do It Your Self Guides |
|
| |
Protecting & Storing Digital Files |
|
| |
Digital Cameras |
|
| |
